EXHAUST SYSTEM REMOVAL/INSTALLATION
BHE011540000W02
-
Warning
-
• A hot engine and exhaust system can cause severe burns. Turn off the engine and wait until they are cool before servicing the exhaust system.
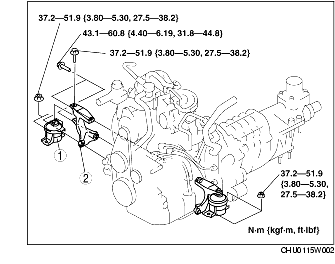
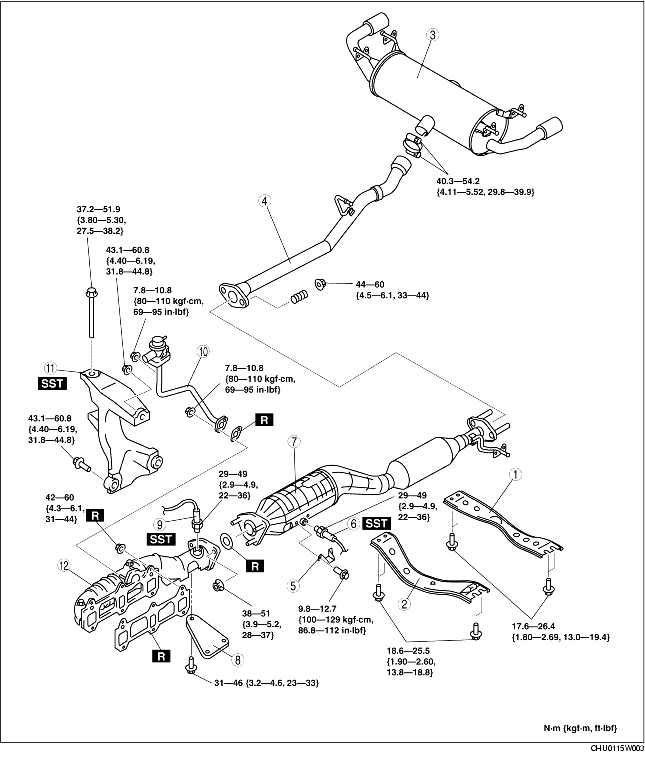
1. Remove in the order indicated in the table.
2. Install in the reverse order of removal.
|
1
|
Rear tunnel member
|
|
2
|
Front tunnel member
|
|
3
|
Main silencer
|
|
4
|
Middle pipe
|
|
5
|
Protector
|
|
6
|
Rear heated oxygen sensor
|
|
7
|
TWC
|
|
8
|
Bracket
|
|
9
|
Front heated oxygen sensor
|
|
10
|
AIR pipe
|
|
11
|
Engine mount bracket (RH)
|
|
12
|
Exhaust manifold
|
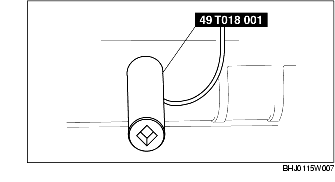
Heated Oxygen Sensor Removal Note
1. Remove the heated oxygen sensor using the SST.
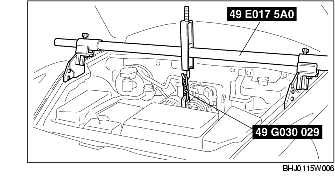
Engine Mount Bracket (RH) Removal Note
1. Attach the SST and support the engine.
2. Remove the engine mount rubber (LH) installation nut.
3. Remove in the order indicated in the table.
|
1
|
Engine mount rubber (RH)
|
|
2
|
Engine mount bracket (RH)
|
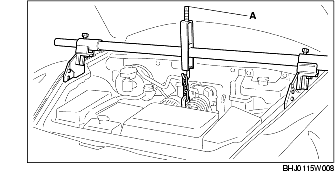
Engine Mount Rubber (RH) Removal Note
1. Tighten the A part indicated in the figure, and then pull up the engine to remove the engine mount rubber (RH).
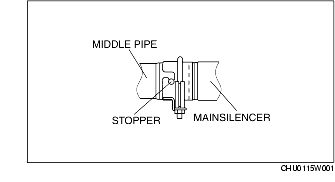
Main Silencer Installation Note
-
Caution
-
• If the main silencer and middle pipe are reused after being separated once, exhaust gas leakage will occur. When replacing the main silencer or middle pipe, always replace the main silencer and middle pipe at the same time.
1. Install the main silencer so that the stopper is at the position shown in the figure.
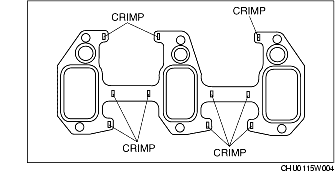
Exhaust Manifold Installation Note
-
Caution
-
• Do not reuse the gasket and self-lock nuts on the joint area between the engine and exhaust manifold.
-
• If a gasket with detached crimps is used on the joint area between the engine and exhaust manifold, exhaust gas will leak. Be careful not to allow the crimps to detach from the gasket. Do not use a gasket if any crimps are detached.