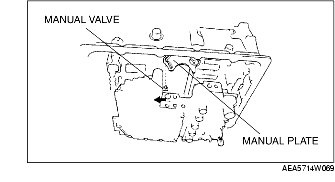
1. Align the manual valve and the manual plate and install the control valve body.
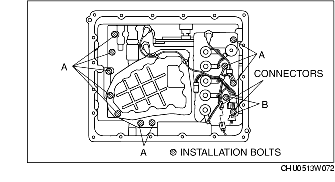
2. Install the installation bolts and connect the connectors as shown in the figure.
3. Install the oil pan and a new gasket to a new oil pan installation bolts.
4. Connect the negative battery cable.
5. Install the battery cover.
6. Install the engine cover. (See ENGINE COVER REMOVAL/INSTALLATION.)
7. Add ATF and, with the engine idling, inspect the ATF level and inspect for leakage. (See AUTOMATIC TRANSMISSION FLUID (ATF) REPLACEMENT.) (See Automatic Transmission Fluid (ATF) Level Inspection.)
8. Perform the mechanical system test. (See MECHANICAL SYSTEM TEST.)
9. Perform the road test. (See ROAD TEST.)