1. Remove the battery.
2. Remove the fresh-air duct and air cleaner. (See INTAKE-AIR SYSTEM REMOVAL/INSTALLATION.)
3. Discharge the refrigerant from the system. (See REFRIGERANT CHARGING.)
4. Remove the front side turn light. (See FRONT SIDE TURN LIGHT REMOVAL/INSTALLATION.)
5. Remove the front bumper. (See FRONT BUMPER REMOVAL/INSTALLATION.)
6. Remove the drive belt. (See DRIVE BELT REPLACEMENT.)
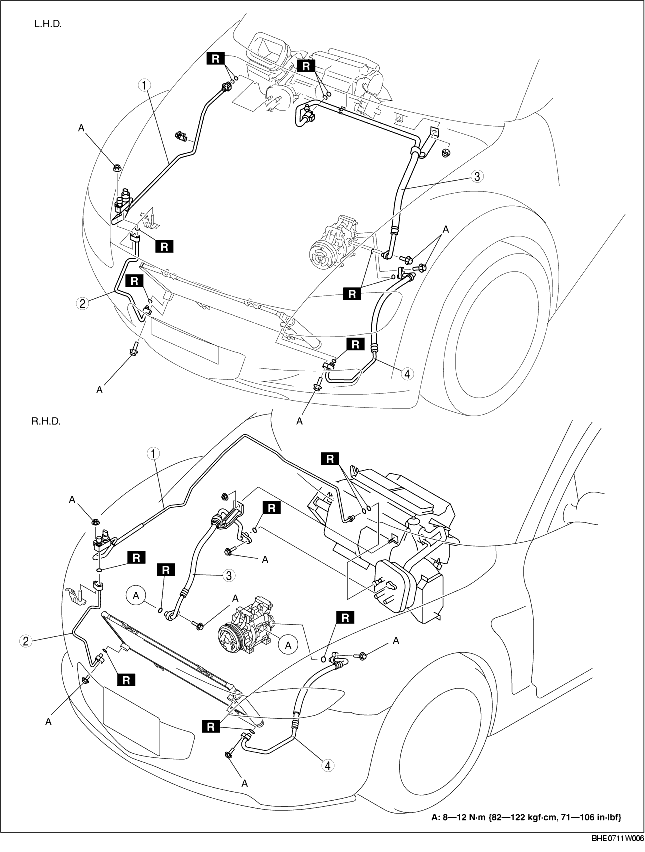
7. Do not allow remaining compressor oil in the piping and connecting parts to spill, and remove in the order indicated in the table.
8. Install in the reverse order of removal.
9. Perform the refrigerant system performance test. (See REFRIGERANT SYSTEM PERFORMANCE TEST.)
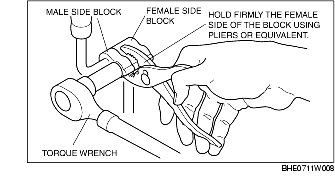
1. Disconnect the block joint type pipes by grasping the female side of the block with pliers or similar tool and holding firmly, and then remove the connection bolt or nut.
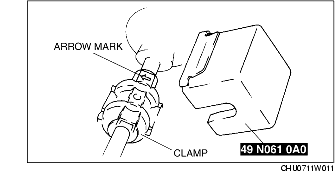
1. Install the SST (49 N061 0A0) to the arrow side of the clamp.
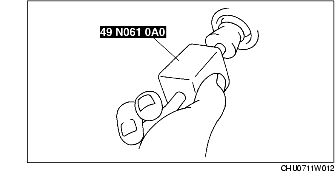
2. Push the SST (49 N061 0A0) with your thumb until it snaps into the clamp.
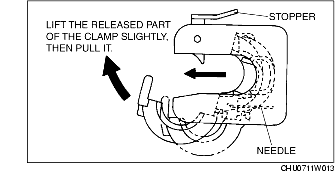
3. Raise the stopper, and pull the SST (49 N061 0A0) from the piping.
4. Remove the SST (49 N061 0A0) from the clamp.
1. Apply compressor oil to the O-ring joints.
2. Tighten the piping joints.
1. Temporarily tighten the joint bolt by hand.
2. Connect the block joint type pipes by grasping the female side of the block with pliers or similar tool and holding firmly, and then tighten the connection bolt or nut with a torque wrench.